236
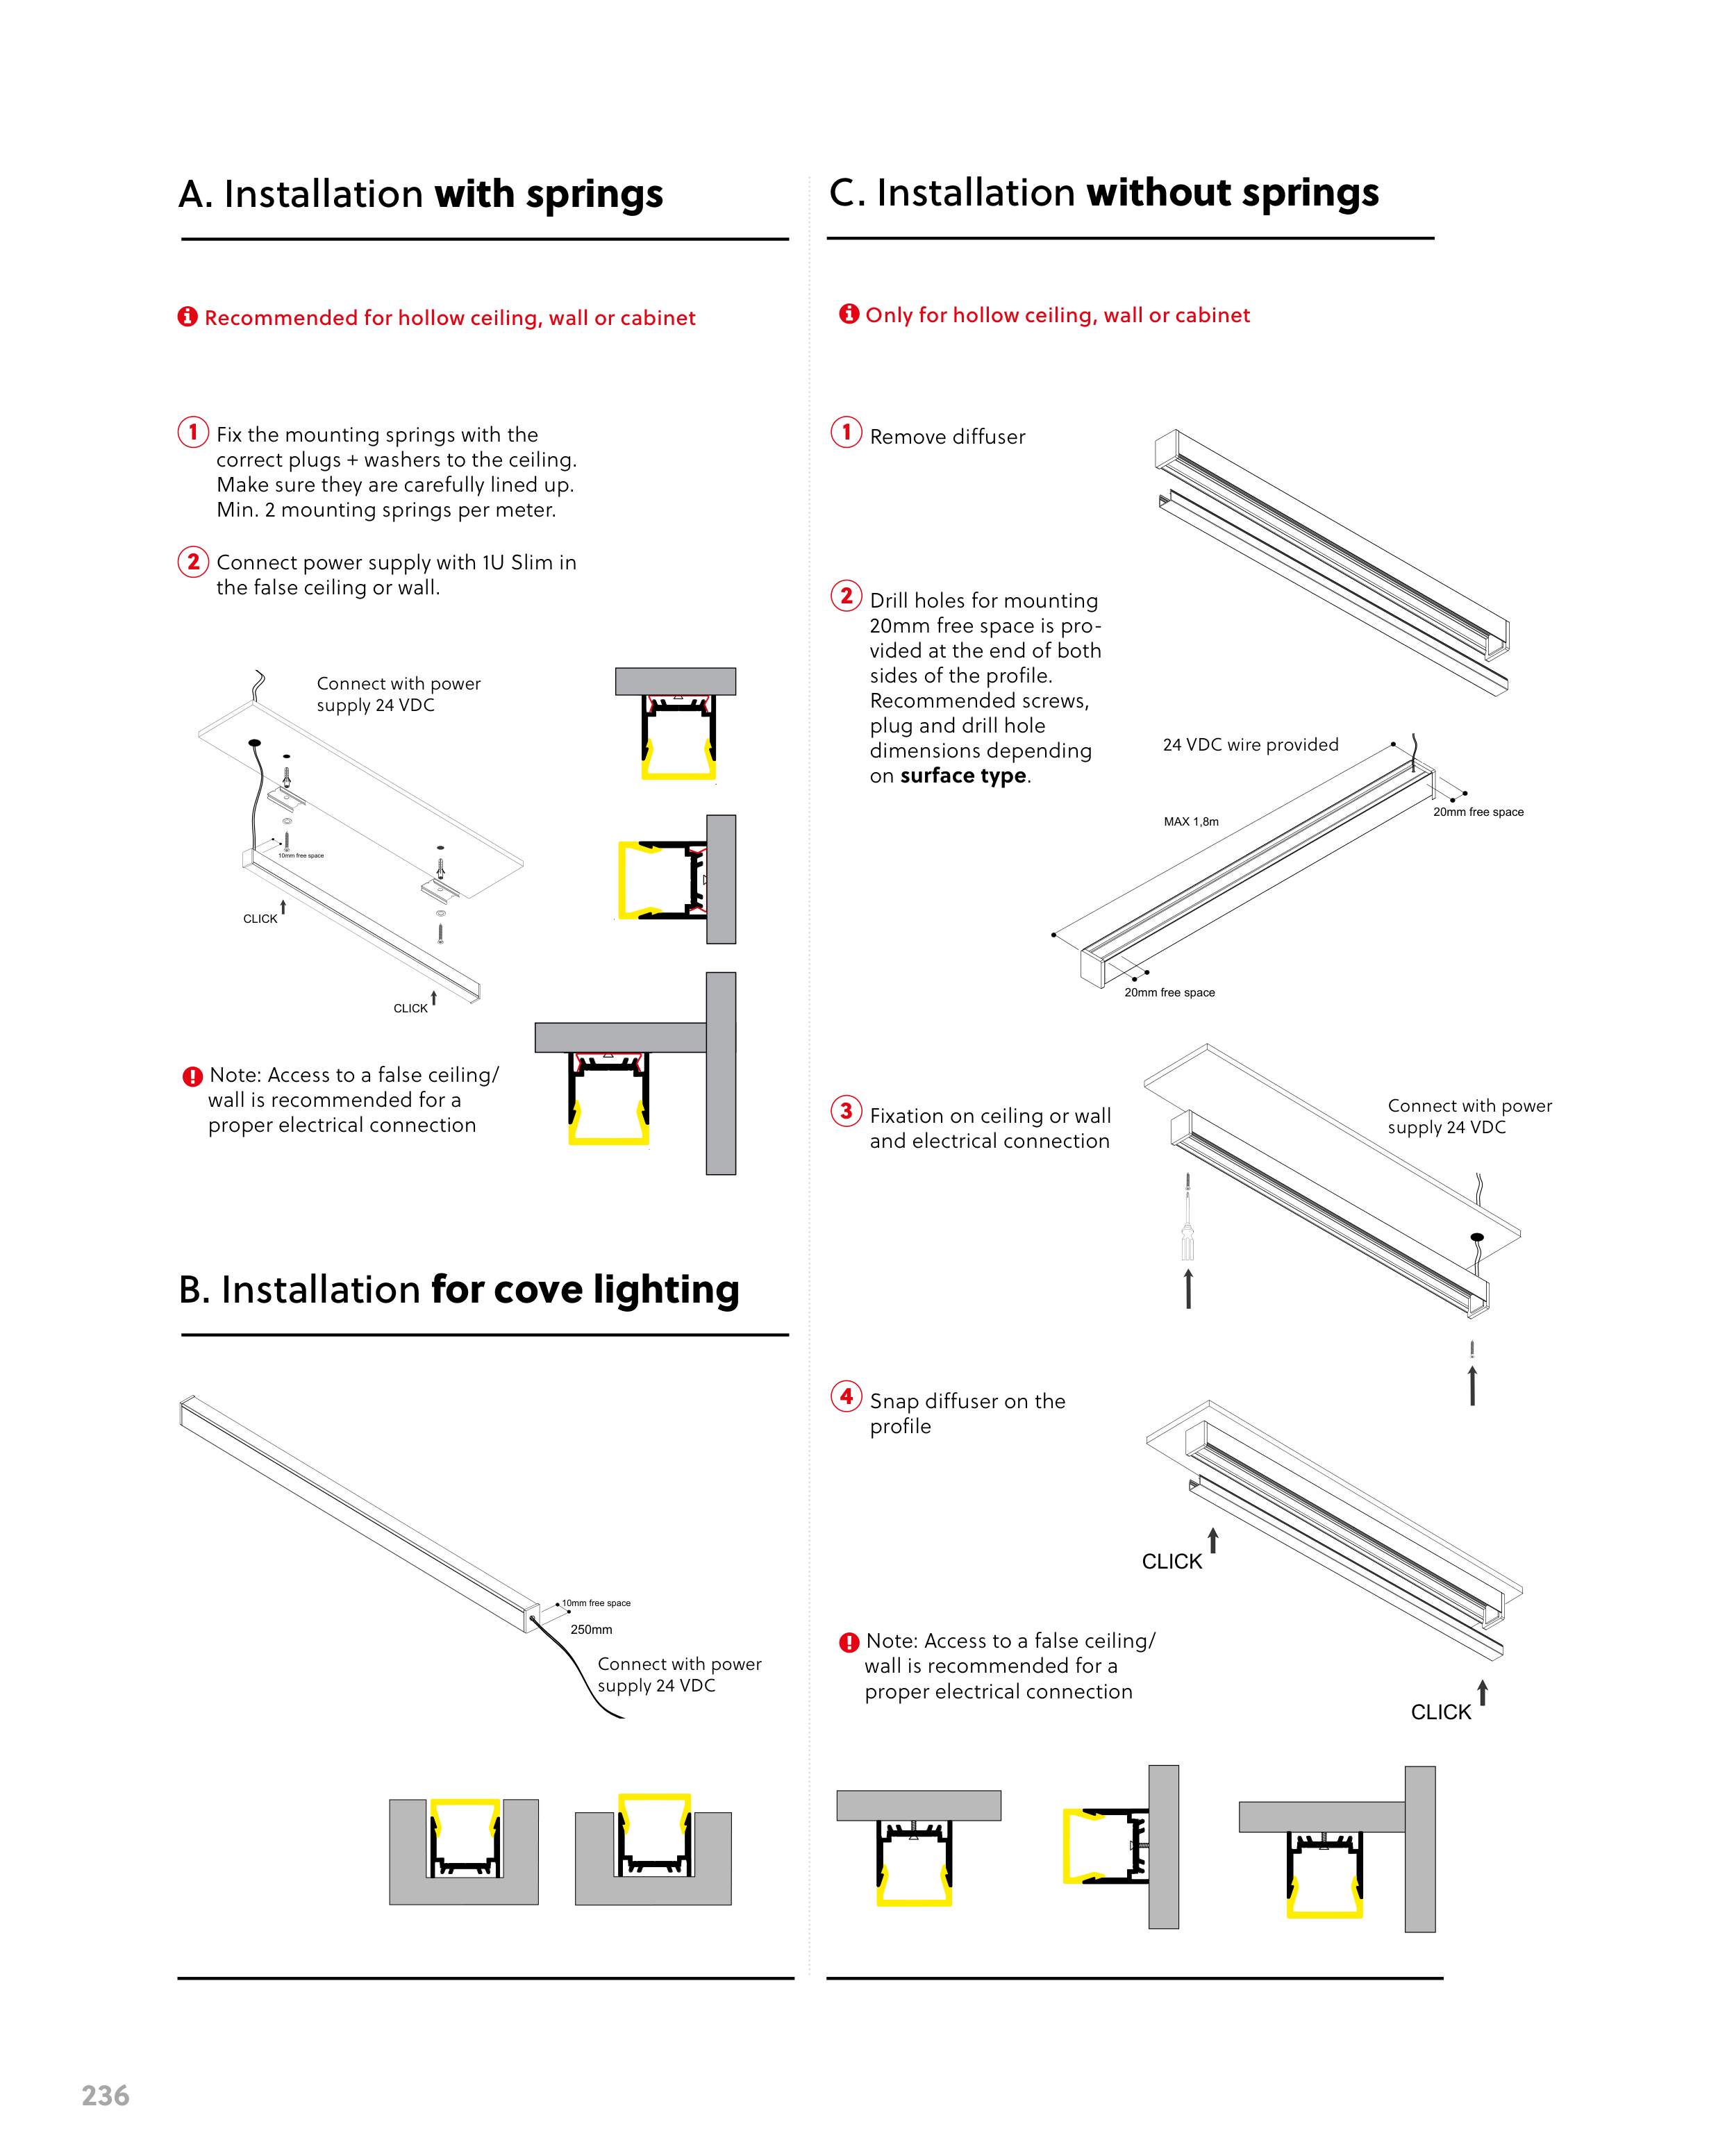
A. Installation with springs
C. Installation without springs
B. Installation for cove lighting
Recommended for hollow ceiling, wall or cabinet
Only for hollow ceiling, wall or cabinet
1
1
2
3
4
2
Fix the mounting springs with the
correct plugs + washers to the ceiling.
Make sure they are carefully lined up.
Min. 2 mounting springs per meter.
Remove diffuser
Drill holes for mounting
20mm free space is pro-
vided at the end of both
sides of the profile.
Recommended screws,
plug and drill hole
dimensions depending
on surface type.
Fixation on ceiling or wall
and electrical connection
Snap diffuser on the
profile
Connect power supply with 1U Slim in
the false ceiling or wall.
Connect with power supply
24 VDC
1
Fix the mounting springs with the correct plugs + washers
to the ceiling.
Make sure they are carefully lined up.
Min. 2 mounting springs per meter.
2
Connect power supply with 1U SLIM in the false
ceiling or wall.
CLICK
CLICK
10mm free space
NOTE
ACCESS TO A FALSE CEILING / WALL
IS RECOMMENDED FOR A PROPER
ELECTRICAL CONNECTION
Connect with power
supply 24 VDC
23
20
18
23
20
18
23
20
18
Note: Access to a false ceiling/
wall is recommended for a
proper electrical connection
Note: Access to a false ceiling/
wall is recommended for a
proper electrical connection
Connect with power supply
24 VDC
250mm
10mm free space
Connect with power
supply 24 VDC
1
REMOVE DIFFUSER.
2
DRILL HOLES FOR MOUNTING
20mm free space is provided at the end of both sides of the profile.
Recommended screws, plug and drill hole dimensions
depending on SURFACE TYPE.
20mm free space
20mm free space
24 VDC WIRE PROVIDED
NOTE
ACCESS TO A FALSE CEILING / WALL
IS RECOMMENDED FOR A PROPER
ELECTRICAL CONNECTION
3
FIXATION ON CEILING OR WALL AND
ELECTRICAL CONNECTION
Connect with power supply
24 VDC
4
SNAP DIFFUSER ON THE PROFILE
CLICK
CLICK
MAX 1,8m
24 VDC wire provided
1
REMOVE DIFFUSER.
2
DRILL HOLES FOR MOUNTING
20mm free space is provided at the end of both sides of the profile.
Recommended screws, plug and drill hole dimensions
depending on SURFACE TYPE.
20mm free space
20mm free space
24 VDC WIRE PROVIDED
NOTE
ACCESS TO A FALSE CEILING / WALL
IS RECOMMENDED FOR A PROPER
ELECTRICAL CONNECTION
3
FIXATION ON CEILING OR WALL AND
ELECTRICAL CONNECTION
Connect with power supply
24 VDC
4
SNAP DIFFUSER ON THE PROFILE
CLICK
CLICK
MAX 1,8m
Connect with power
supply 24 VDC