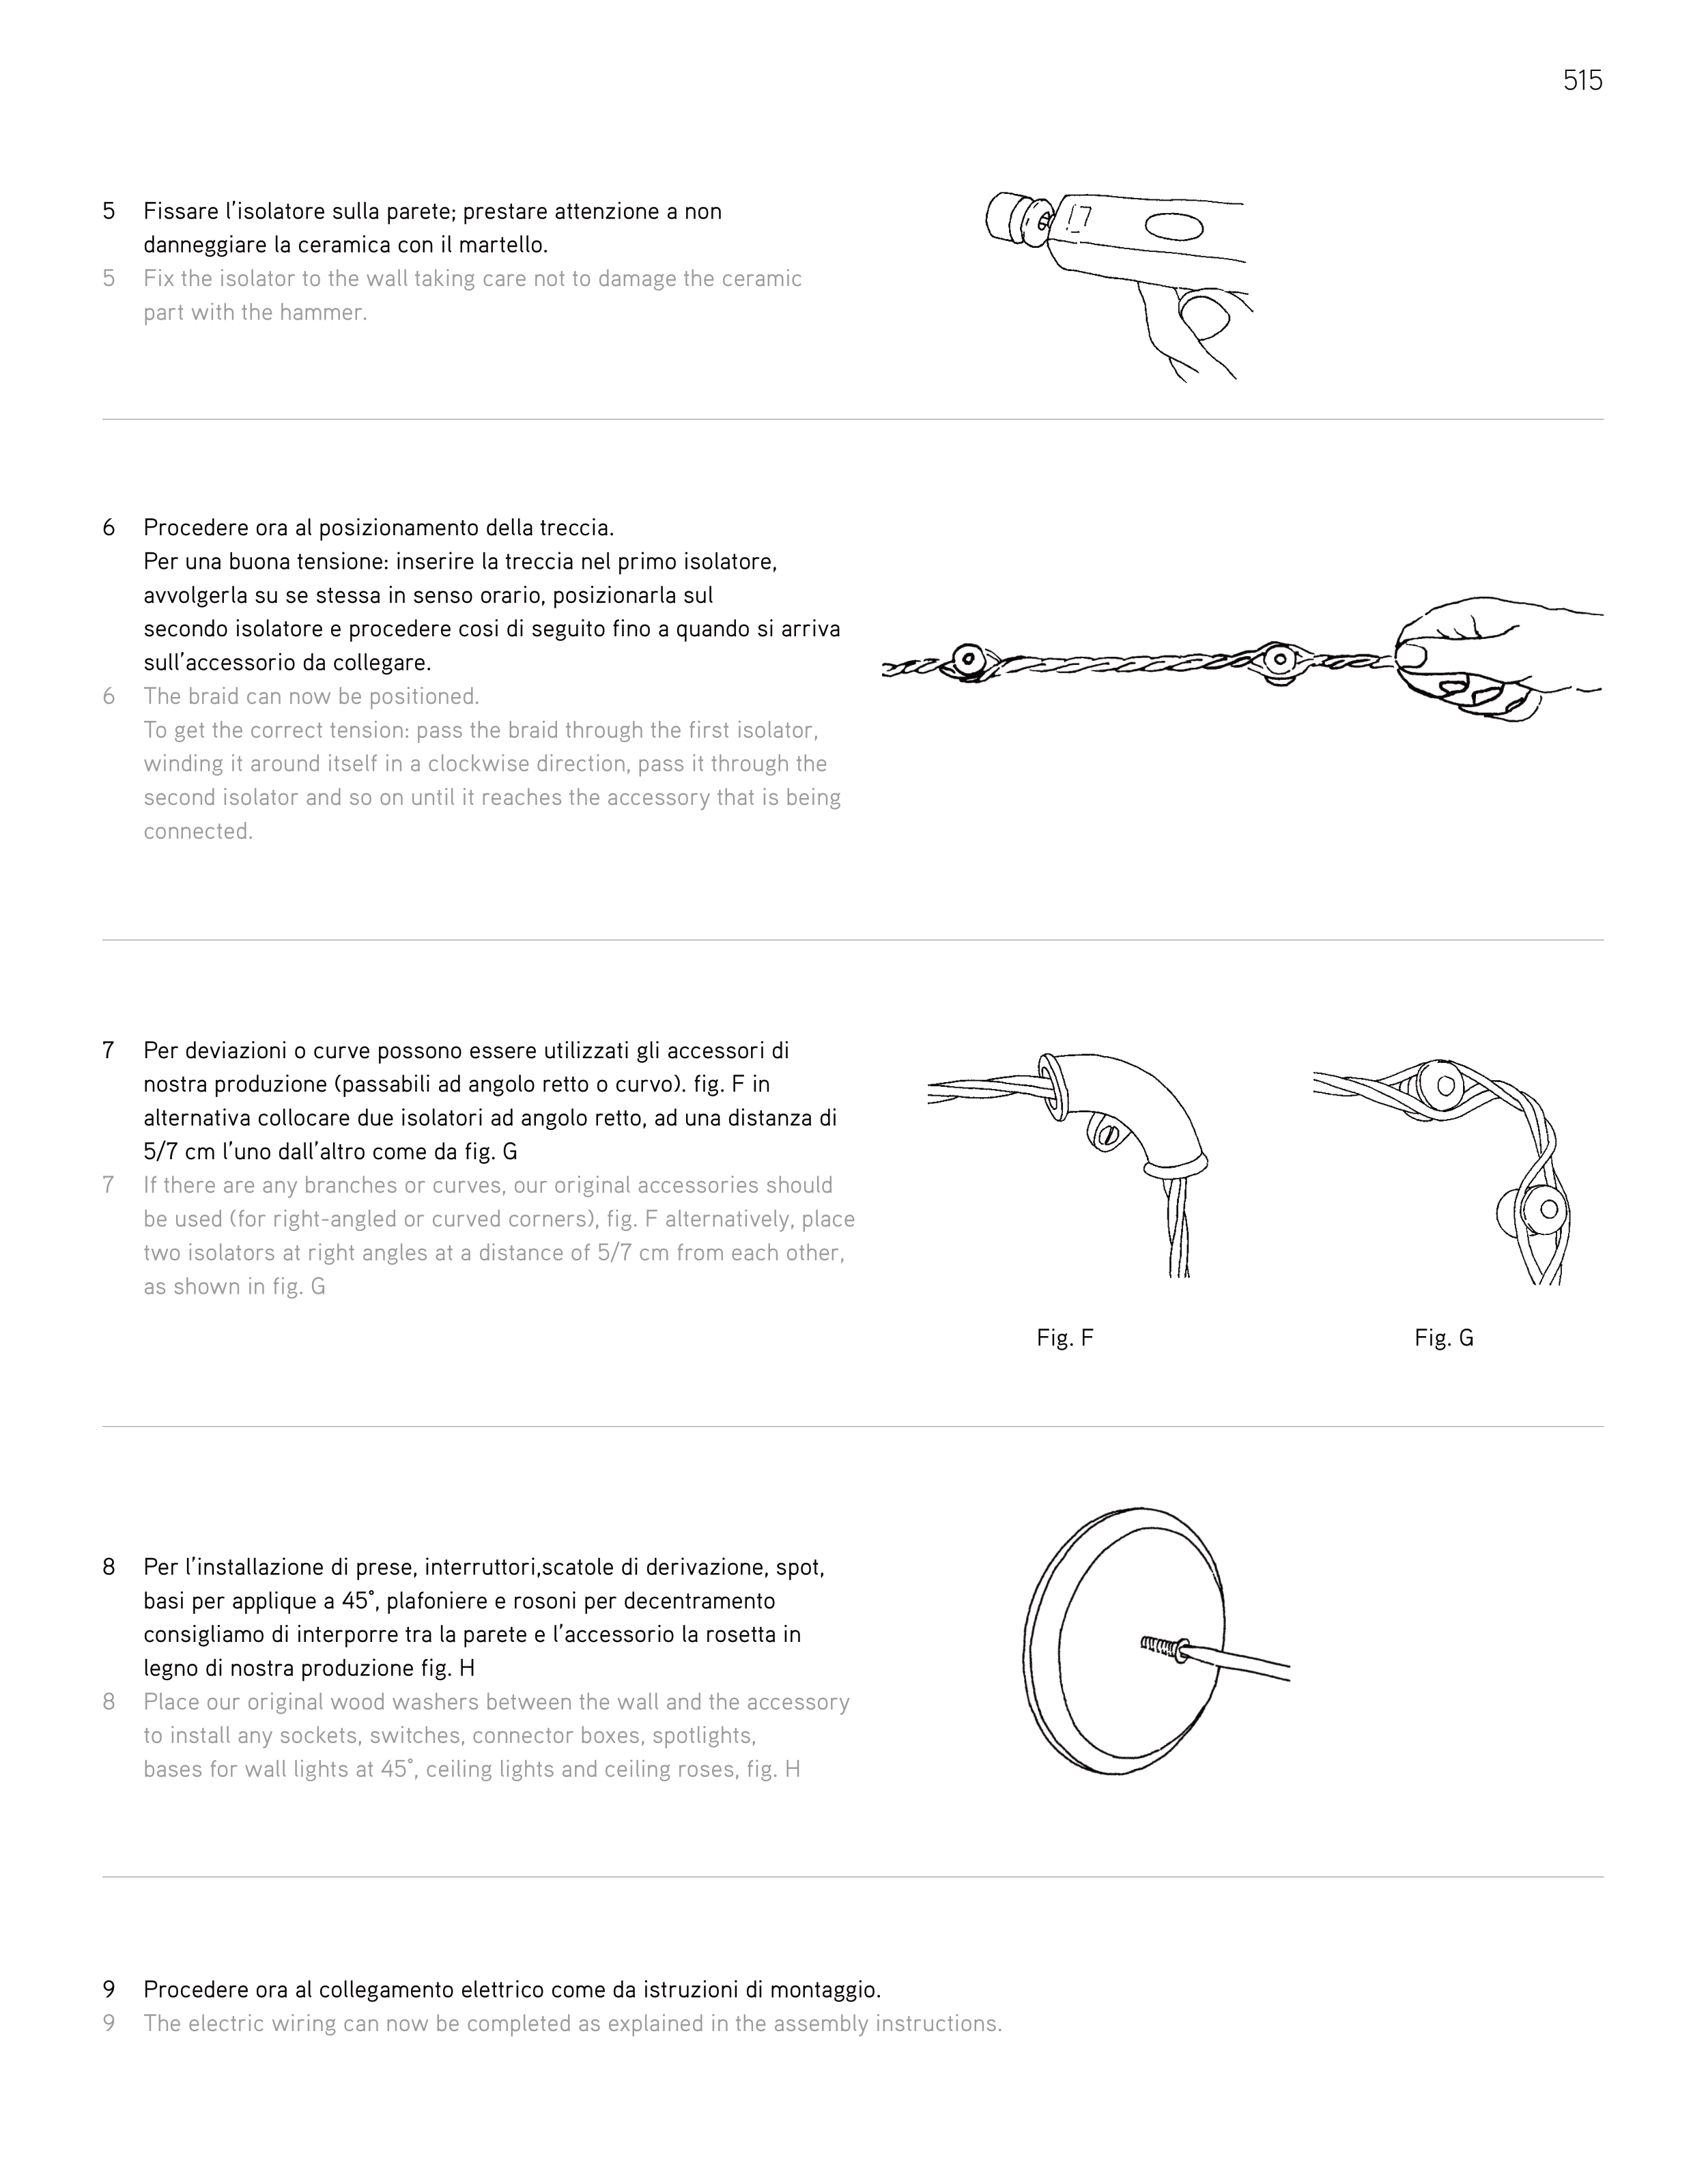
Fig. F
Fig. G
8
Per l’installazione di prese, interruttori,scatole di derivazione, spot,
basi per applique a 45°, plafoniere e rosoni per decentramento
consigliamo di interporre tra la parete e l’accessorio la rosetta in
legno di nostra produzione fig. H
8
Place our original wood washers between the wall and the accessory
to install any sockets, switches, connector boxes, spotlights,
bases for wall lights at 45°, ceiling lights and ceiling roses, fig. H
5
Fissare l’isolatore sulla parete; prestare attenzione a non
danneggiare la ceramica con il martello.
5
Fix the isolator to the wall taking care not to damage the ceramic
part with the hammer.
9
Procedere ora al collegamento elettrico come da istruzioni di montaggio.
9
The electric wiring can now be completed as explained in the assembly instructions.
6
Procedere ora al posizionamento della treccia.
Per una buona tensione: inserire la treccia nel primo isolatore,
avvolgerla su se stessa in senso orario, posizionarla sul
secondo isolatore e procedere cosi di seguito fino a quando si arriva
sull’accessorio da collegare.
6
The braid can now be positioned.
To get the correct tension: pass the braid through the first isolator,
winding it around itself in a clockwise direction, pass it through the
second isolator and so on until it reaches the accessory that is being
connected.
7
Per deviazioni o curve possono essere utilizzati gli accessori di
nostra produzione (passabili ad angolo retto o curvo). fig. F in
alternativa collocare due isolatori ad angolo retto, ad una distanza di
5/7 cm l’uno dall’altro come da fig. G
7
If there are any branches or curves, our original accessories should
be used (for right-angled or curved corners), fig. F alternatively, place
two isolators at right angles at a distance of 5/7 cm from each other,
as shown in fig. G
515


