256
3. Home automation systems
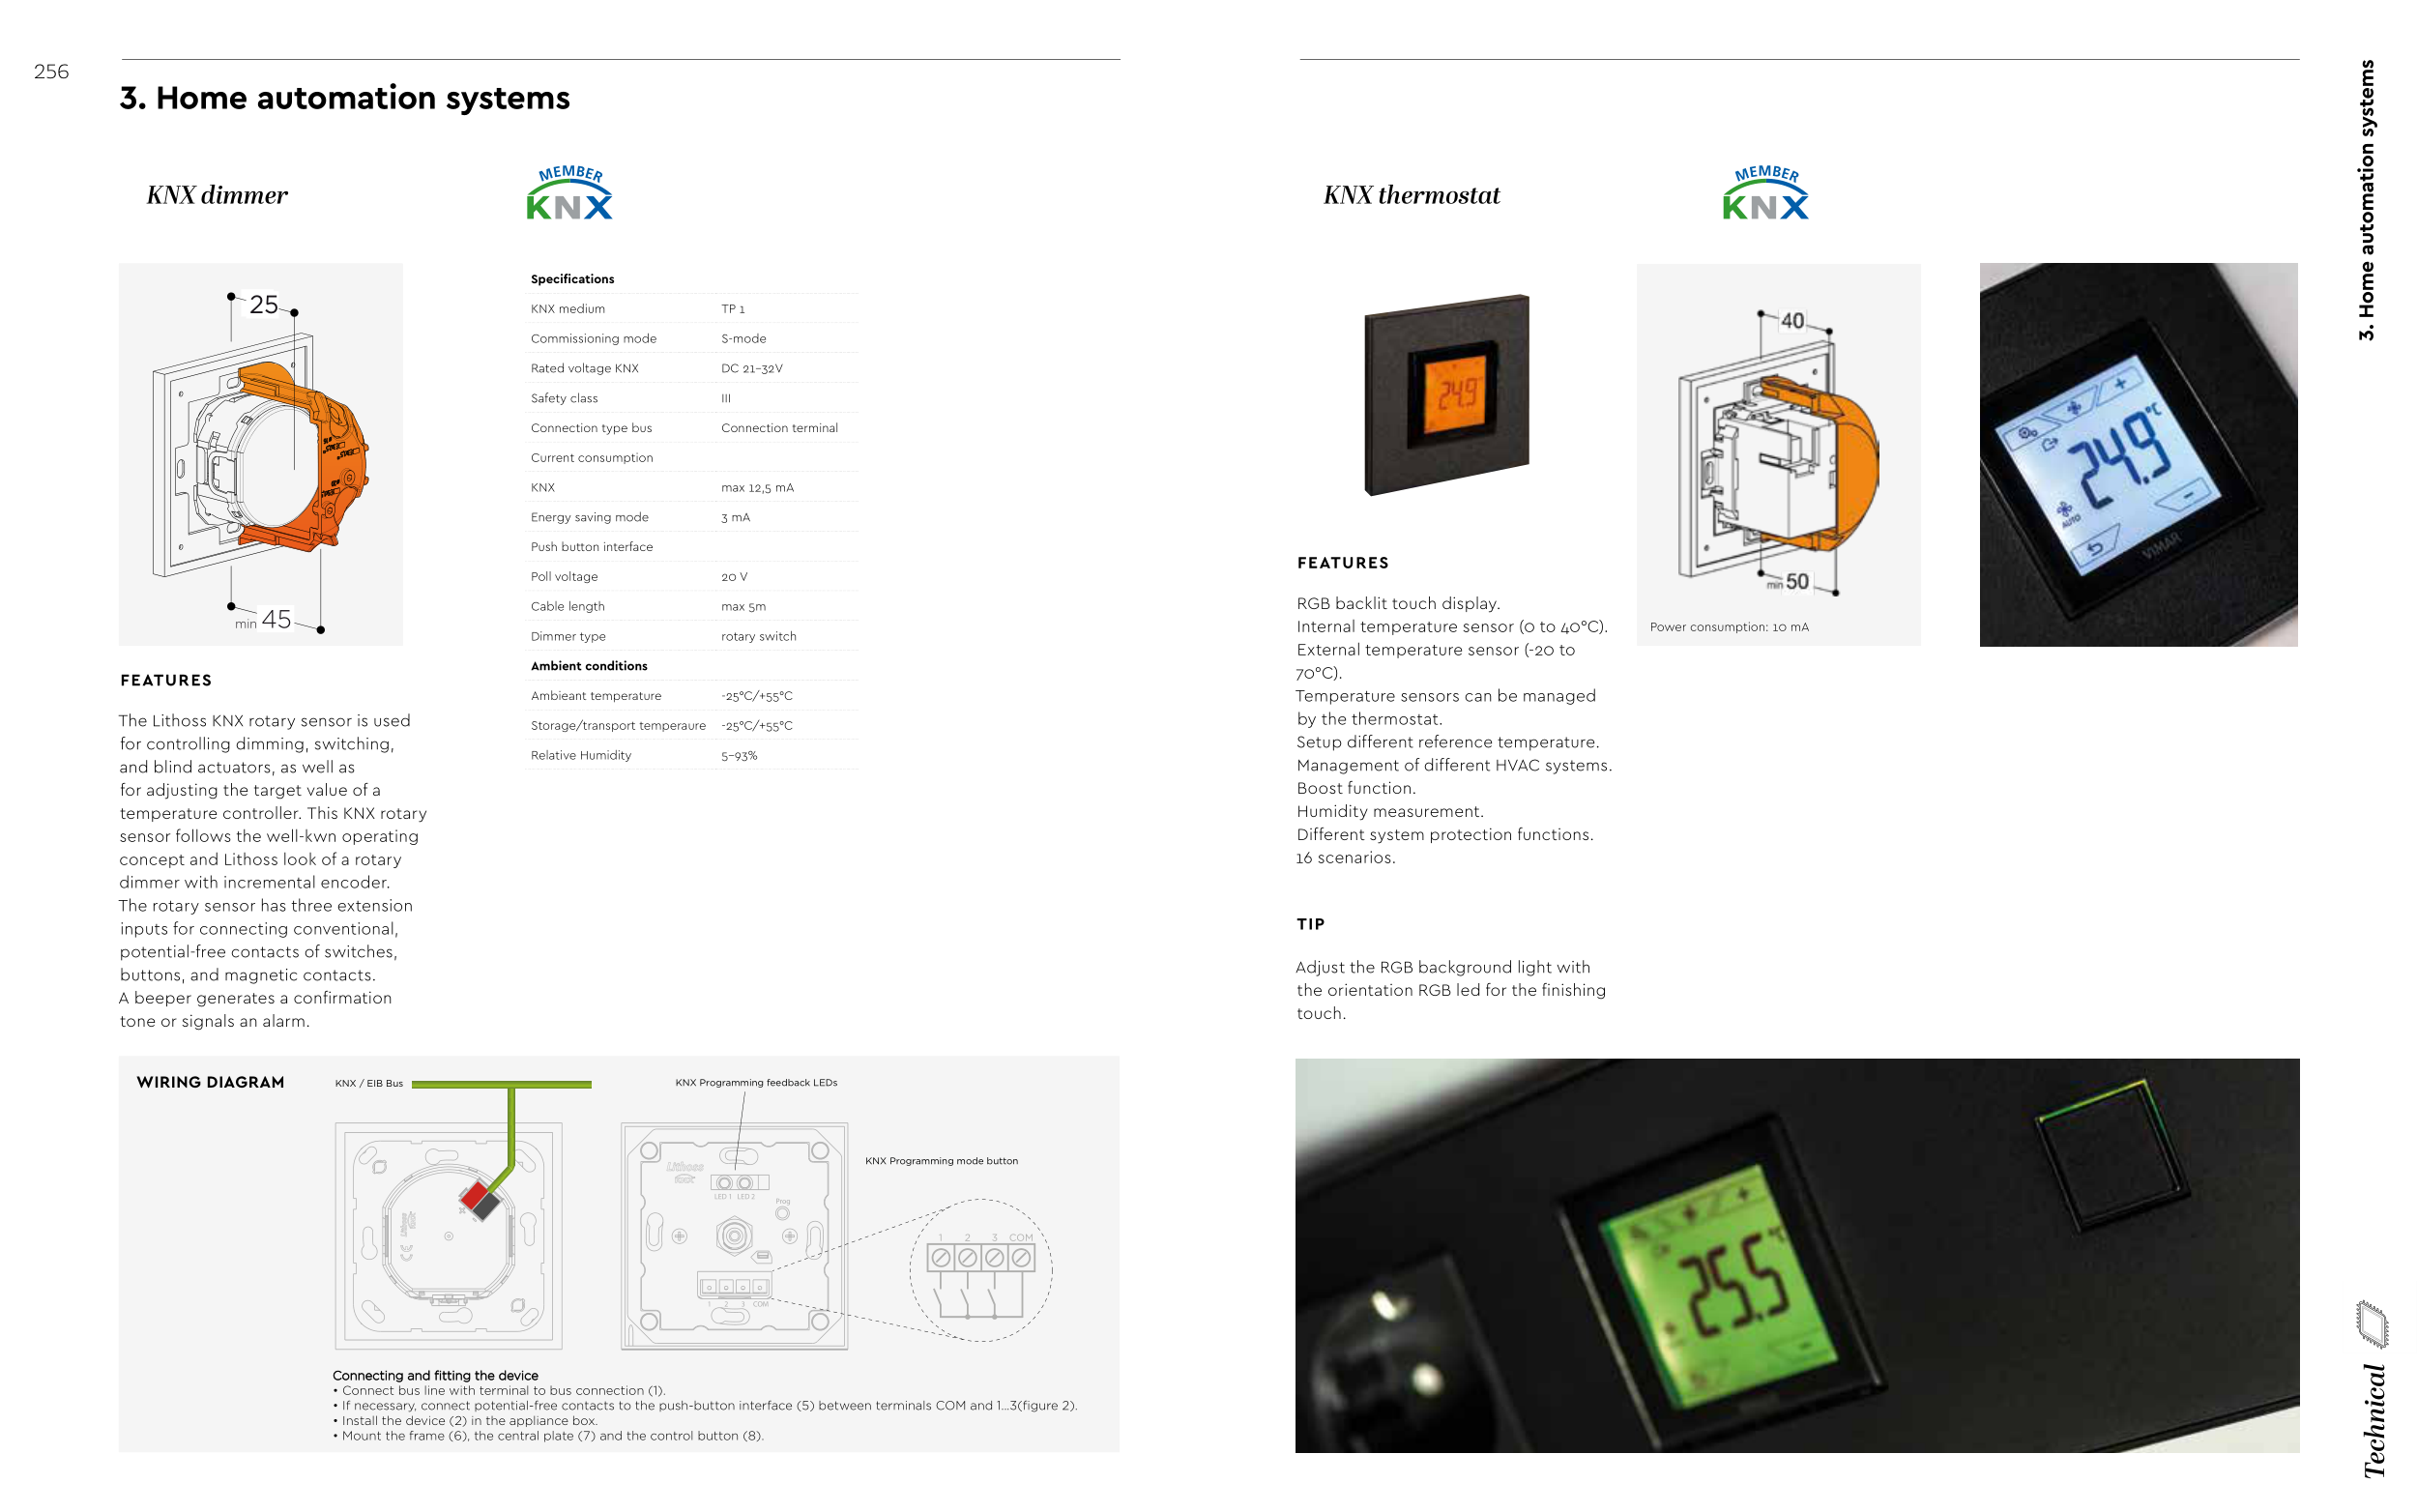
KNX thermostat
FEATURES
RGB backlit touch display.
Internal temperature sensor (0 to 40°C).
External temperature sensor (-20 to
70°C).
Temperature sensors can be managed
by the thermostat.
Setup different reference temperature.
Management of different HVAC systems.
Boost function.
Humidity measurement.
Different system protection functions.
16 scenarios.
TIP
Adjust the RGB background light with
the orientation RGB led for the finishing
touch.
Power consumption: 10 mA
3. Home automation systems
KNX dimmer
FEATURES
The Lithoss KNX rotary sensor is used
for controlling dimming, switching,
and blind actuators, as well as
for adjusting the target value of a
temperature controller. This KNX rotary
sensor follows the well-kwn operating
concept and Lithoss look of a rotary
dimmer with incremental encoder.
The rotary sensor has three extension
inputs for connecting conventional,
potential-free contacts of switches,
buttons, and magnetic contacts.
A beeper generates a confirmation
tone or signals an alarm.
Dimmer KNX
Installation
Name
MADE IN BELGIUM 06/11/2019 - Art. 101797 - VERSION 1
Hole dia 68mm
OR
RECESSED WALL BOX INSTALLATION
PUT COVERPLATE AND DIMMER INTO PLACE
PAY ATTENTION TO POSITION DIMMER
Box with screws
FIX FRAME TO
WALL OR JUNCTION BOX
WITH 2 SCREWS
(USE HOLES ON VERTICAL AXIS)
1
2
3
Specifications
Connection type bus
Commissioning mode
Rated voltage KNX
Safety class
KNX medium
Connection terminal
S-mode
DC 21-32V
III
TP 1
KNX
Energy saving mode
Current consumtion
max 12,5 mA
3 mA
Push button interface
Cable length
dimmer type
Poll voltage
max 5m
rotary switch
20 V
Ambient conditions
Storage/transport temperaure
Relative Humidity
Ambieant temperature
-25°C/+55°C
5-93%
-25°C/+55°C
Wiring diagram
Moortelmeers 23, B-8740 PITTEM - BELGIUM
Tel ++32(0)56 48 15 98 - info@lithoss.com - www.lithoss.com
Color
Code
Dimmer
Dm
Product
Code
KNX
Module
0K
Code
PRODUCT
MODULE
COLOR
Copper
29
Matt White + Textured Black
35
Brushed Brass + Brass Knurl
37
Textured Black
14
Textured Black + Nickel
32
Tin Antique
19
Brass Antique
20
Stainless Steel + Nickel Knurl
38
Gunpowder Black (Fusain)
41
Nickel + Nickel Knurl
43
Bronze Antique + Brass Knurl
39
Texture Black + Brass Knurl
46
Stainless Steel
01
Brushed Brass
06
Nickel + Texture Black
09
Matt White RAL9010
02
Dm 0K 0 2
Connecting and fitting the device
• Connect bus line with terminal to bus connection (1).
• If necessary, connect potential-free contacts to the push-button interface (5) between terminals COM and 1...3(figure 2).
• Install the device (2) in the appliance box.
• Mount the frame (6), the central plate (7) and the control button (8).
1
2
3
COM
MAGNETIC
ATTRACTION
PUSH IN
PLACE
1
LED 1 LED 2
Prog
2
3
COM
KNX Programming feedback LEDs
KNX Programming mode button
KNX / EIB Bus
min 45
35
Ref
84
84
6.5
WIRING DIAGRAM
Specifications
KNX medium
TP 1
Commissioning mode
S-mode
Rated voltage KNX
DC 21–32V
Safety class
III
Connection type bus
Connection terminal
Current consumption
KNX
max 12,5 mA
Energy saving mode
3 mA
Push button interface
Poll voltage
20 V
Cable length
max 5m
Dimmer type
rotary switch
Ambient conditions
Ambieant temperature
-25°C/+55°C
Storage/transport temperaure
-25°C/+55°C
Relative Humidity
5–93%
min 45
25
Technical


