781
Linear lights
3
4
5
6
1
2
1
3
2
4
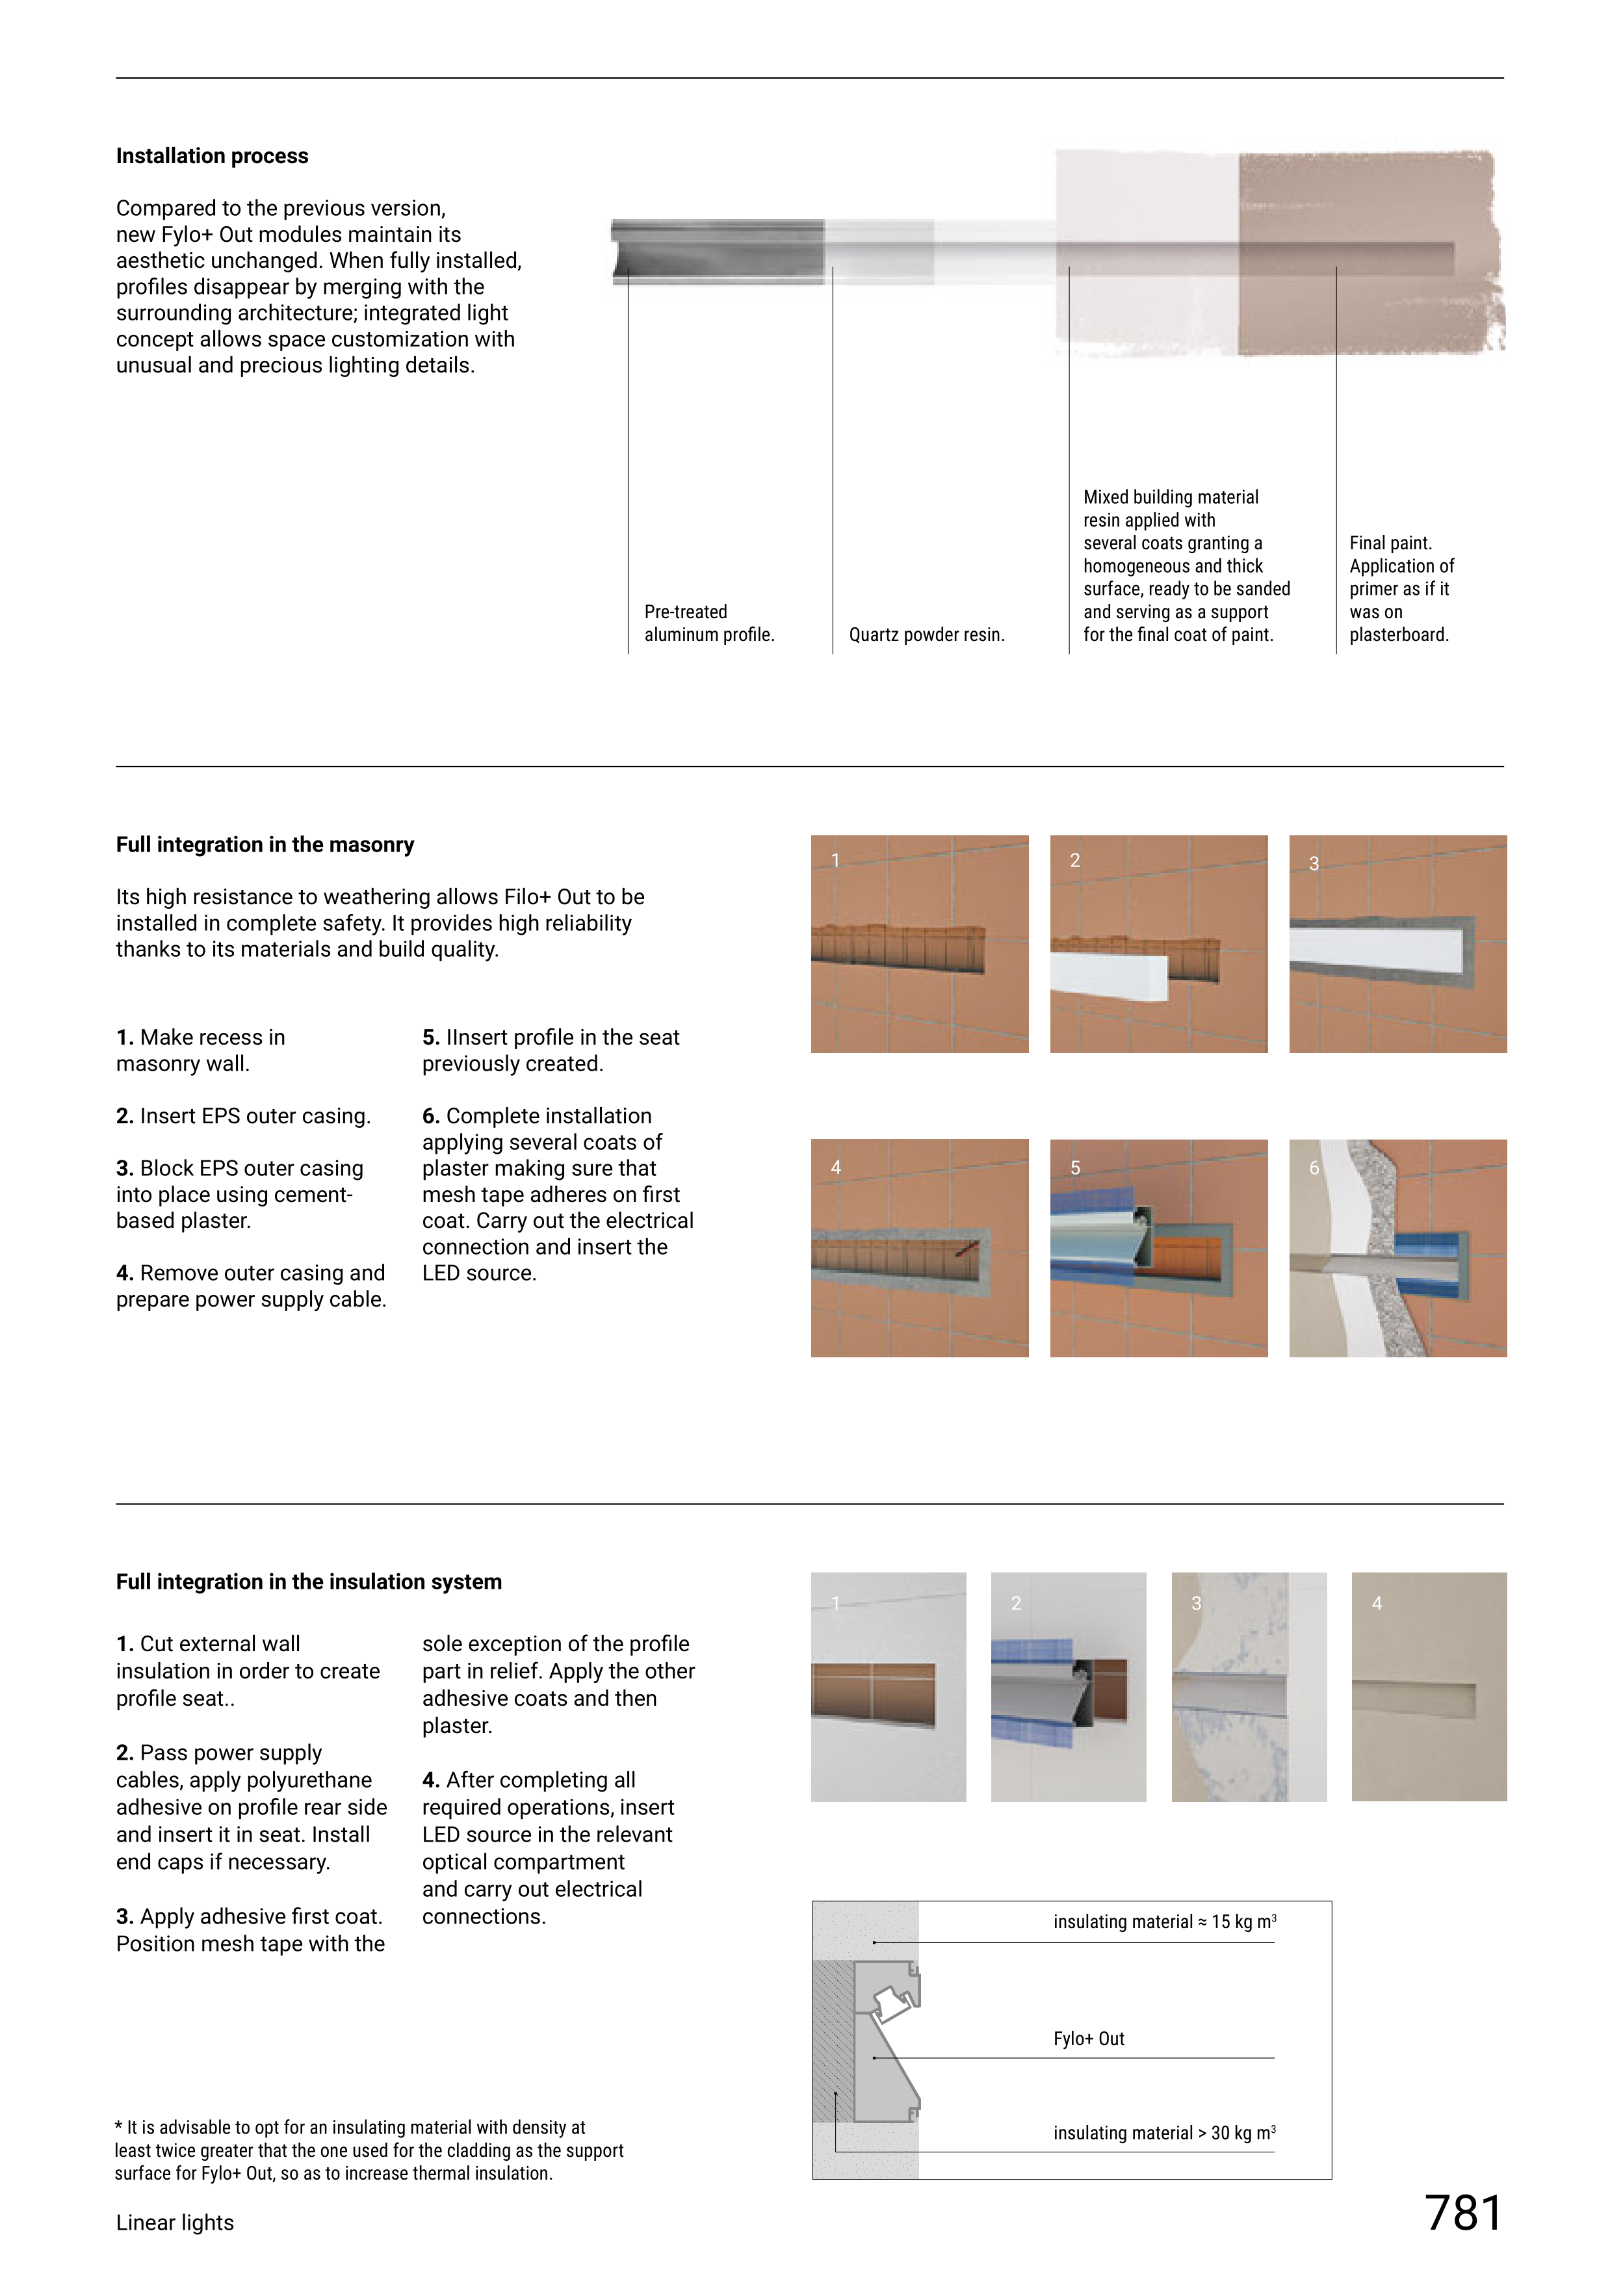
Quartz powder resin.
Pre-treated
aluminum profile.
Mixed building material
resin applied with
several coats granting a
homogeneous and thick
surface, ready to be sanded
and serving as a support
for the final coat of paint.
Final paint.
Application of
primer as if it
was on
plasterboard.
Installation process
Compared to the previous version,
new Fylo+ Out modules maintain its
aesthetic unchanged. When fully installed,
profiles disappear by merging with the
surrounding architecture; integrated light
concept allows space customization with
unusual and precious lighting details.
Full integration in the masonry
Its high resistance to weathering allows Filo+ Out to be
installed in complete safety. It provides high reliability
thanks to its materials and build quality.
Full integration in the insulation system
1. Make recess in
masonry wall.
2. Insert EPS outer casing.
3. Block EPS outer casing
into place using cement-
based plaster.
4. Remove outer casing and
prepare power supply cable.
5. IInsert profile in the seat
previously created.
6. Complete installation
applying several coats of
plaster making sure that
mesh tape adheres on first
coat. Carry out the electrical
connection and insert the
LED source.
1. Cut external wall
insulation in order to create
profile seat..
2. Pass power supply
cables, apply polyurethane
adhesive on profile rear side
and insert it in seat. Install
end caps if necessary.
3. Apply adhesive first coat.
Position mesh tape with the
sole exception of the profile
part in relief. Apply the other
adhesive coats and then
plaster.
4. After completing all
required operations, insert
LED source in the relevant
optical compartment
and carry out electrical
connections.
insulating material ≈ 15 kg m3
insulating material > 30 kg m3
Fylo+ Out
* It is advisable to opt for an insulating material with density at
least twice greater that the one used for the cladding as the support
surface for Fylo+ Out, so as to increase thermal insulation.
back to index


