950
950
650
50
650
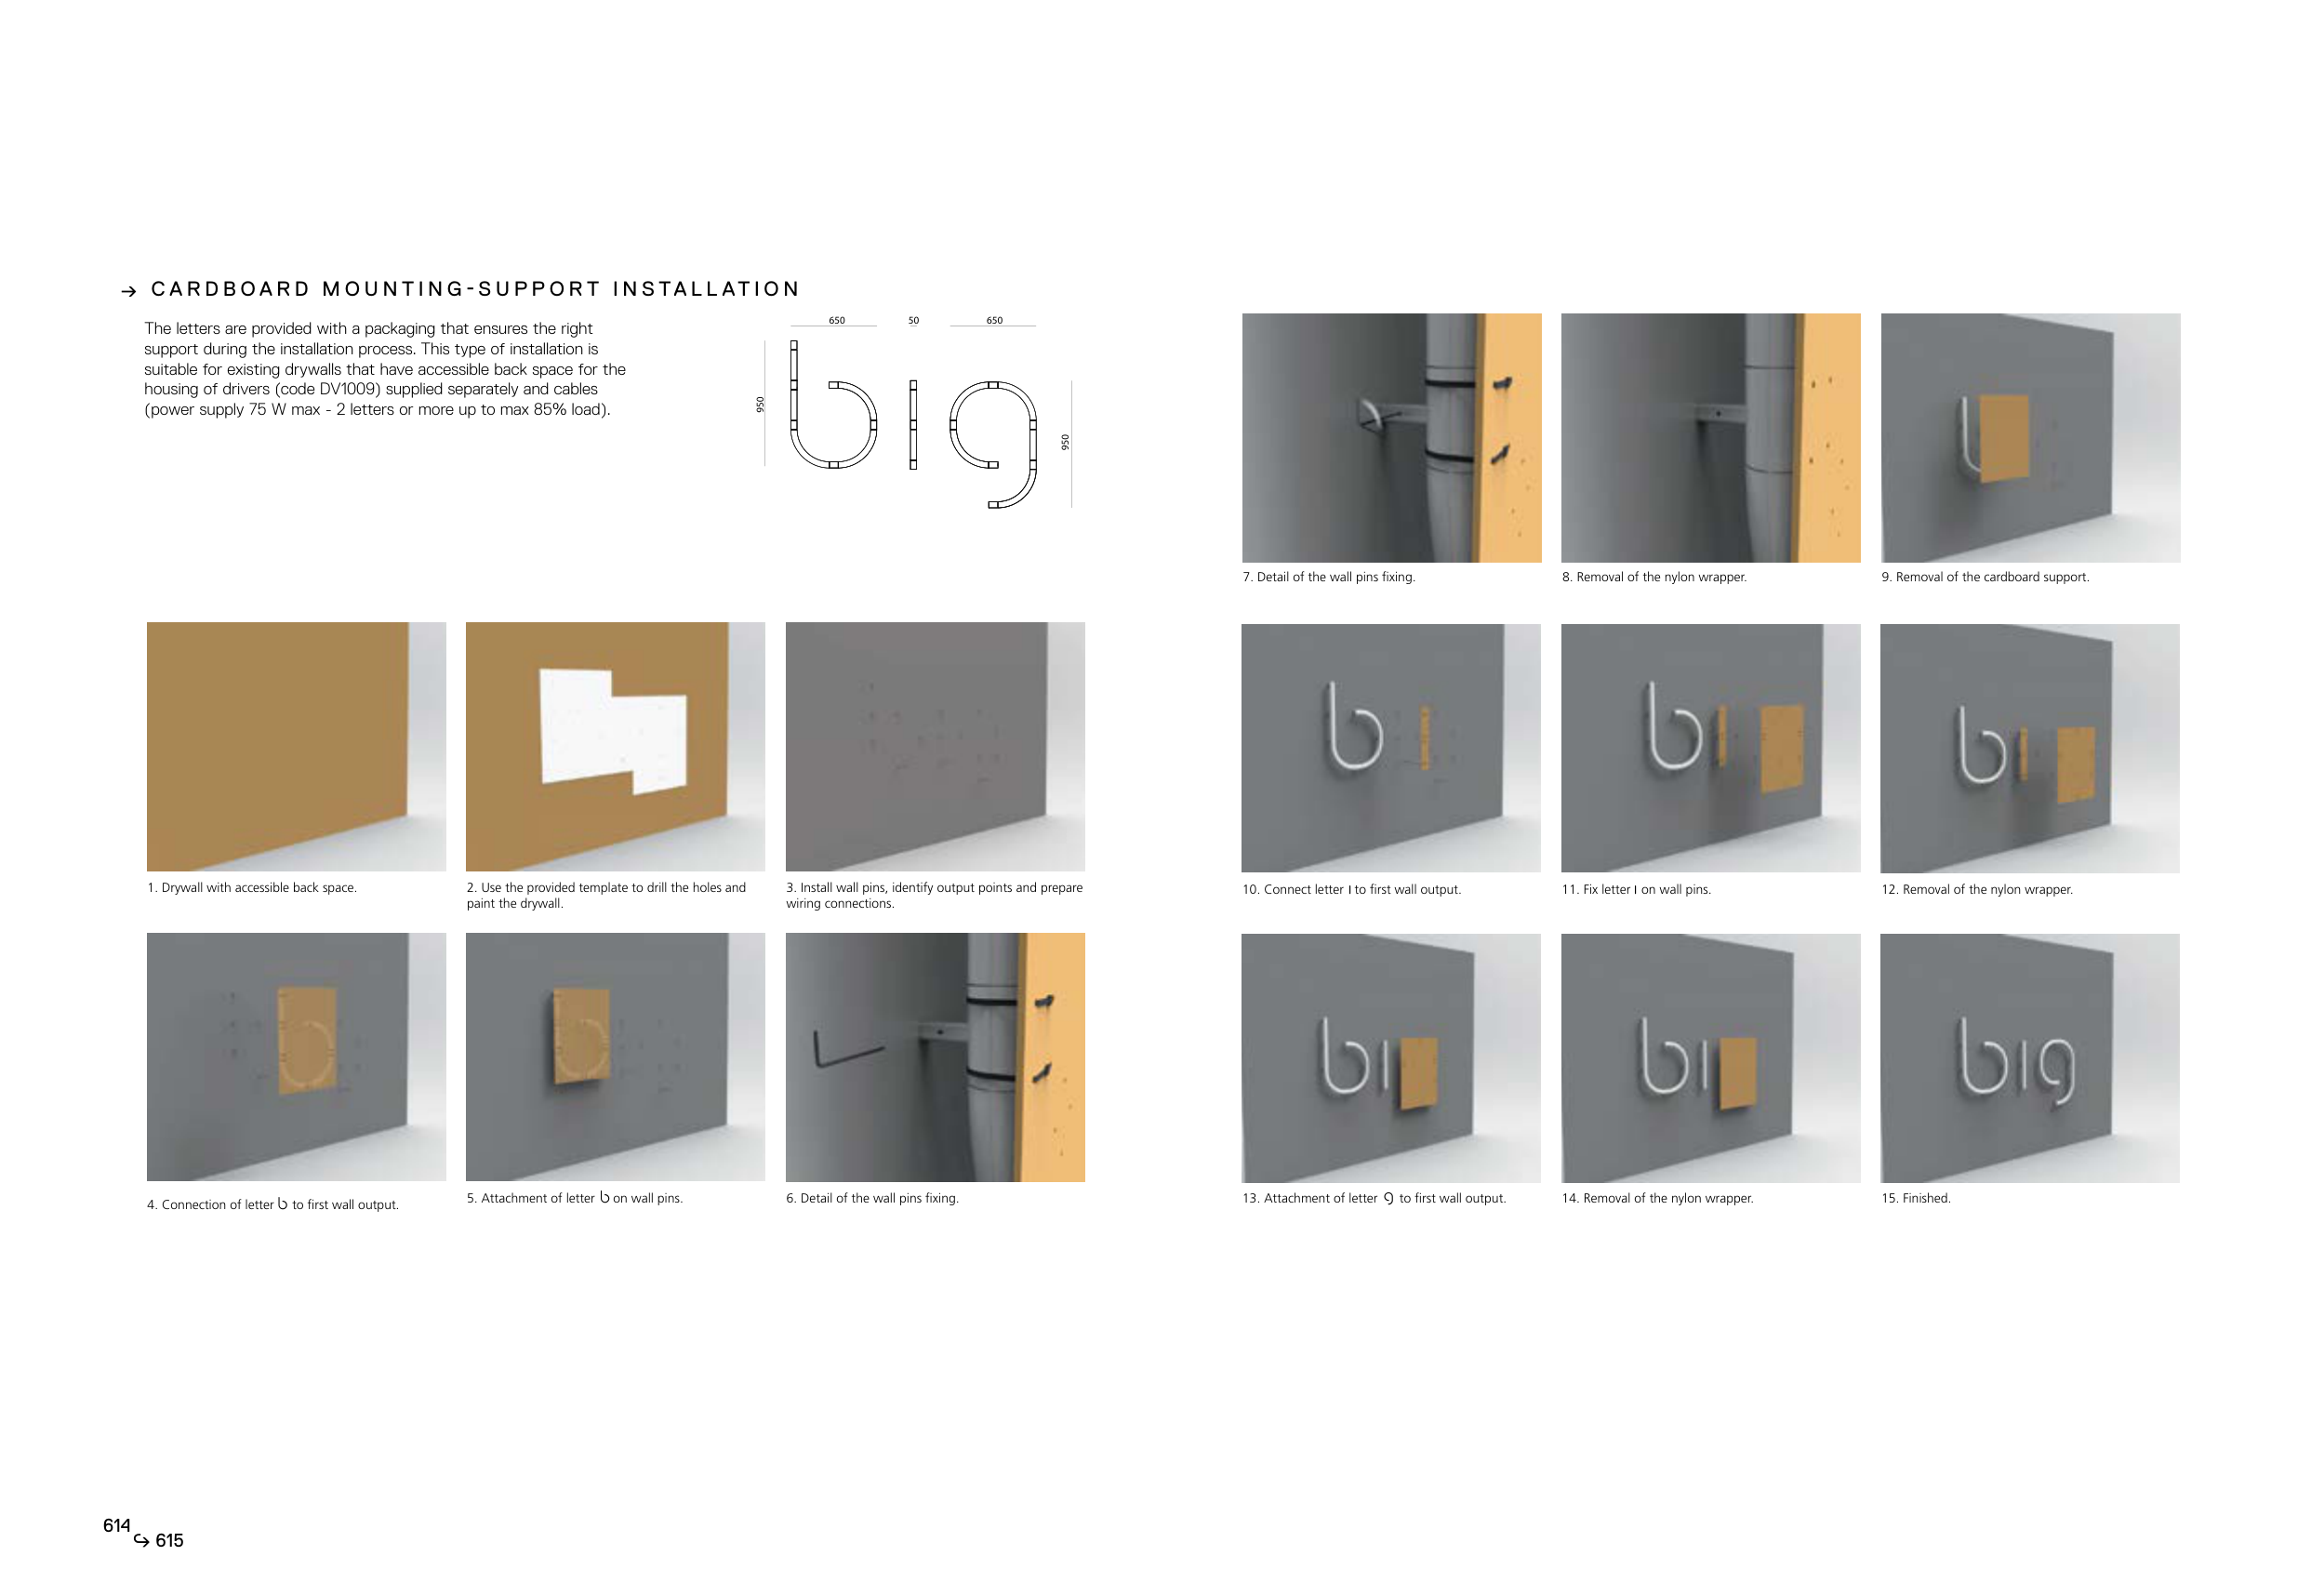
1. Drywall with accessible back space.
2. Use the provided template to drill the holes and
paint the drywall.
3. Install wall pins, identify output points and prepare
wiring connections.
4. Connection of letter to first wall output.
5. Attachment of letter on wall pins.
6. Detail of the wall pins fixing.
b
b
7. Detail of the wall pins fixing.
8. Removal of the nylon wrapper.
9. Removal of the cardboard support.
10. Connect letter to first wall output.
11. Fix letter on wall pins.
12. Removal of the nylon wrapper.
13. Attachment of letter to first wall output.
14. Removal of the nylon wrapper.
15. Finished.
i
i
g
→ C A R D B O A R D M O U N T I N G - S U P P O R T I N S TA L L AT I O N
The letters are provided with a packaging that ensures the right
support during the installation process. This type of installation is
suitable for existing drywalls that have accessible back space for the
housing of drivers (code DV1009) supplied separately and cables
(power supply 75 W max - 2 letters or more up to max 85% load).
614
615


